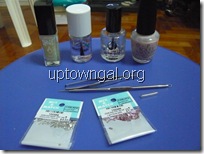
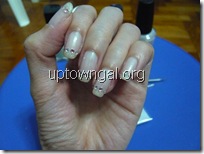
Charmed by the Swarovski crystals on my nails last week, I decided to try applying them on my nails myself. Saw how the manicurist did it last week and so I adapted…
Steps:
1. Use base coat.
2. Use 2 coats of nail colour.
3. Apply 2 coats of white/gold glitter on the tips of nails (simulating a French manicure).
4. Drop a small glob of base coat onto a piece of paper.
5. Dip the sharp point of that metal tool in the pic above (er… not sure what it’s called but it’s meant for squeezing black heads) into the drop of base coat, then use it to pick up the crystal by tapping on the top of the crystal.
6. Still “holding†the crystal, dip the bottom of the crystal into the base coat, thus substituting nail glue.
7. Stick the crystal onto nail.
8. Apply 2 coats of quick dry top coat.
Voila! (Btw, there’re many different sizes & colours of crystals that can be bought from Mix & Match at People’s Park Centre. Really cheap too!)


0 Responses to “DIY Nail Art”